This is one of my favorite makes ever, hands down: this fabric, the fit, the buttons. Magic.
PATTERN
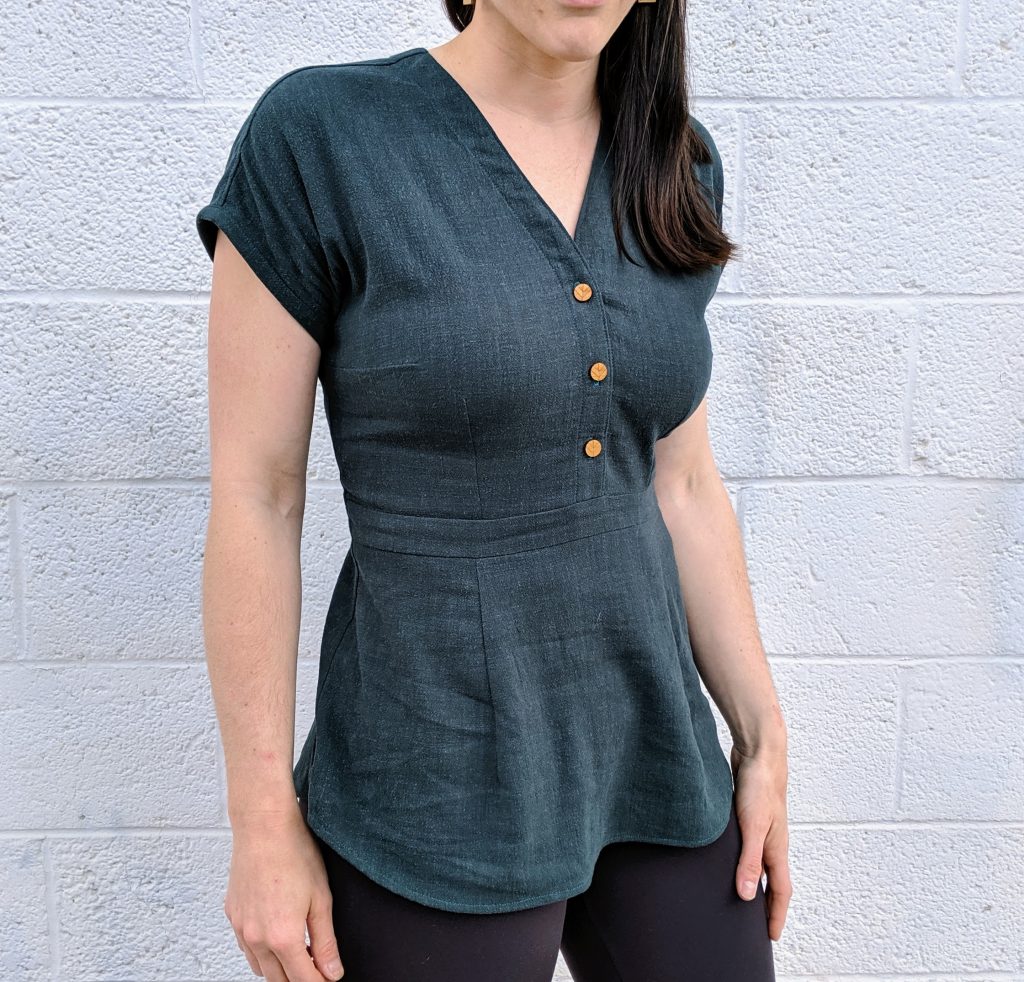
I made View A with the C/D cup. Sizing described below in ‘Sizing & Modifications’.
I previously made the dress version of this Chalk & Notch Fringe, but after I heard about the cup size update, I knew it was time to make the blouse version! Before this, I was on the ‘printed pattern’ train (bc lazy me), but this made me jump off that train and campaign hard for pdf patterns only (mixed metaphors? oh well 🙂 )
Without the pdf, I wouldn’t have been able to get this new cup size! This pattern update made a big difference. In my previous dress version of this pattern, I made a size 6/8 and was comfortable with the flowiness of the dress, but it had a totally different fit. I liked it, but now I LOOOVE it!
FABRIC
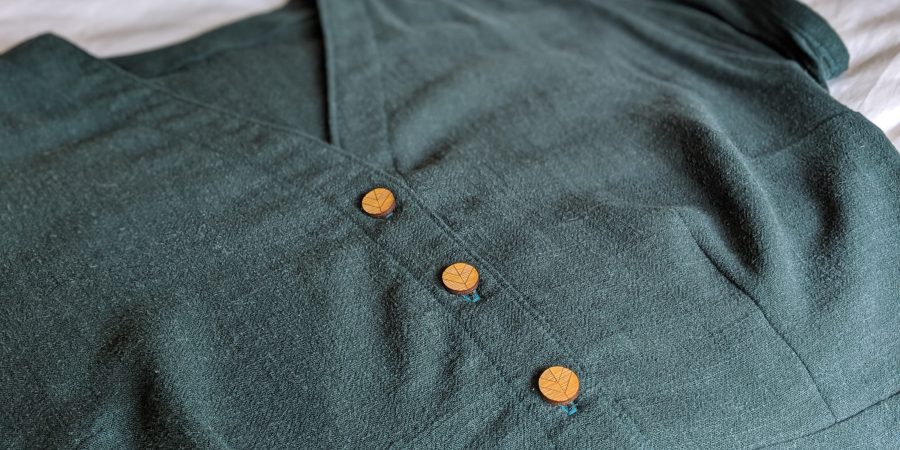
I LOVE (love love love) this viscose linen noil from Blackbird Fabrics! This fabric is dreamy. It’s soft. It’s buttery! There is no other way to describe it! (And I bought it in 3 other colors after making this top). It has a slight slub texture and appearance that I really like. It is a beautiful spruce color that is better captured in the close-up button photo below.
I used approximately 1.5 yards.
I used a thin fusible interfacing (Pellon P44) on both the neckline facing, and also to the main fabric along the neckline where the facing would be attached. The fabric was a bit shifty, so the interfacing helped to stabilize it.

SIZING & MODIFICATIONS
I made a wearable muslin of the new pattern recently, using a size 6, and it felt a bit loose fitting through the bust. My measurements are approximately 37-29-42 (34D bust for reference). Looking at the finished garment measurements, I could tell there was a bit of ease in the bust and hip. And knowing that the fabric had a bit of give (needed to pull it over my shoulders & bust), I chose to size down to a size 4 in the bodice for a fitted look. I lowered the bust dart 1/2 inch. I used a size 0 for the skirt.
*Darts
For the blouse “skirt”, I used darts instead of the gathers, like I did on my dress version. The image below isn’t exactly the correct dart match up that I ended up using. I found it easier to fully make the bodice, and then mark the location of the darts on the skirt so they match the darts on the bodice.
To determine the two legs of the skirt dart, I first line up the center front (CF) of the skirt with the CF of the bodice, and then mark the inner legs of the darts (to match the finished bodice darts). Keeping the CFs matched, I pull in the fabric so that the sides of the bodice line up with the sides of the skirt (folding in excess fabric, which will be the dart), and then mark the outer leg of the dart (again, matching the bodice dart). You can adjust the length of the the dart to your liking, depending on the width of the dart. Mine ended up being twice as long as the bodice darts.
*Waist
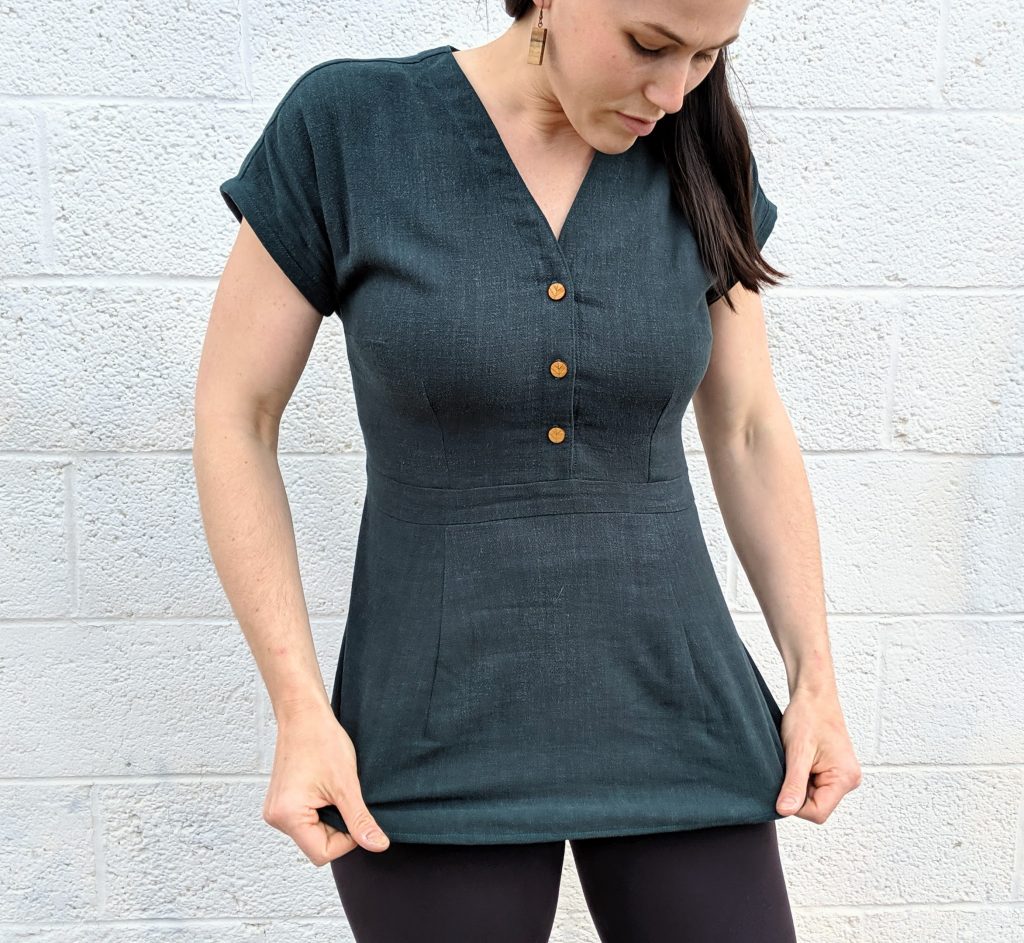
I added a center waist band piece (approximately 2 inches wide, including seam allowances).
There are waist ties in the back! You can’t see them! They make this top look SUPER fitted! I had someone on instagram ask how I got this top on! (Does it have a zipper?!) I can actually slip it over my head! I attribute it to the wonderful fabric! But, back to the waist ties. The top IS fitted in the bust, but the ties in the back add to the fitted look. The pattern has you turn a tube, but I hate doing that on such a thin piece. So I double folded a strip of fabric that was approximately 1.25 inches wide by 26 inches long, pressed it well and topstitched it. The ties were inserted and sewn into the back darts, just outside the seam allowance of the bottom of the bodice piece.
*Modified assembly
Just like in my dress version, I prefer to assemble all the front pieces (front bodice+front skirt), and assemble all the back pieces into one piece, and then sew the side seams. It prevents the mid-section bulge that I don’t like. This is different than the directions, which instructs you sew the bodice pieces together (back bodice+front bodice), and then attach the full skirt piece.
The last mod I made was to the arm cuffs. Instead of the cuffs, I used a thin binding, for a shorter sleeve cuff.
That’s it!
BUTTONS!
Ok, one more thing. Let me gush about these buttons for a second. I have seen some of these Arrow Mountain buttons kicking around on some instagram photos, but I wasn’t a believer until I saw them in person. They have mostly wooden buttons, but also really cool colored acrylic buttons in different shapes. After I made this top I bought about 5 more kinds of wooden buttons!
Hi! I have a question about the waist sizing. If your waist measurement is 29″how do you use a size 0 skirt pattern and have enough ease? I love the fitted look. Thanks!
If you look at the actual pattern piece you will see the piece is large bc of the gathers. I essentially did not use the pieces as intended. I used a piece that was large enough to add darts to, and line up with the width of the top. Hopefully that makes sense. You can see how the pieces line up in the image I took under the section labeled “Darts”.
ah got it! thank you for the response. that makes sense. so the only place the fabric “gathers” is the darts? Do you think that would work for the dress length? I’m usually a size 4 all around.
Sorry for the delayed response! The pattern instructs for you to gather all the way across both the front and back, at the waist. But what I did instead is to eliminate the gathers altogether and use darts in the front and back. I think this would work for the dress length for sure! let me know if you have any other questions!
It turned out beautifully!!!!!
Thanks Emily! You’re so sweet 🙂